


Project Sheet
Polymer Clay Fairy House
Add a touch of the fantastical to your environment.
- Difficulty Level: Intermediate
- Completion Time: ~8 hours
Watch a video overview:
Whimsical fairy houses have been popping up in the homes and gardens of crafty people recently, bringing a little magic to the environments of kids and adults alike. We show you how to make a polymer-clay fairy house in the form of a lidded container, perfect for storing your favorite small items.
What You'll Need
Before you begin, make sure you have all the supplies you'll need. The list below contains all the products we used to create the example shown in this demo. Materials are optional based upon your own design.
- g2 Bottle Cutter
- Polymer Clay – We used a mixture of brands. Kato Polyclay – (Neutral and Primary Sets), Fimo Clay, Premo Sculpey, Soufflé Sculpey
- Liquid Sculpey
- Non-stick Craft Sheet
- Polyroller
- Balsa Sticks
- PolyBlade Polymer Clay Blade
- Lace Draping Tool
- Boxwood Modeling Tools
- Detail Mini High Temp Glue Gun
- Glue sticks
- Recycled Glass container
- Aluminum foil
- Tongs/Gloves & Protective Eye Wear
1. Cut and Sand Your Glass
 Choose a glass bottle or glass container for your project. Clean the glass of any labels and sticky residues.
For safety, we recommend wearing protective eye wear and gloves/using tongs during the process of cutting and separating glass.
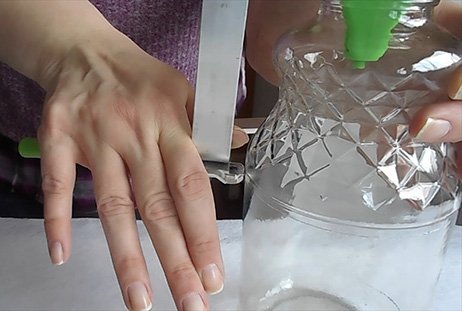
Position the glass cutter where the vertical bar is parallel to the bottle. Raise or lower the perpendicular blade to the height at which you wish to cut the glass. Tighten the wing nuts. Place your hand with an open palm on top the blade handle and support bar of the cutter. Apply firm consistent pressure. With your other hand, turn the bottle in a counter clockwise direction. You should hear a gravely sound as the blade scores the glass. Create the score line with one full rotation.
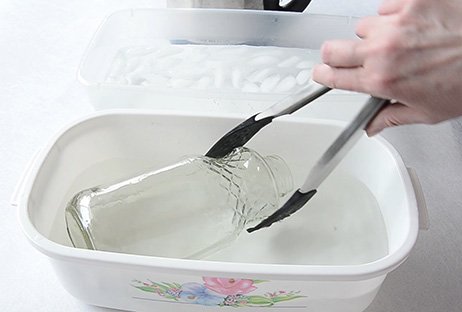 Prepare a container with hot water and one with ice water. Dip the glass container into alternating hot and cold baths with a hold time in each of about 5 seconds. The glass should separate due to the fluctuation in temperature. If the bottle doesn’t separate, use the included tapping bar to aid the split. Gently tap above the score line and progress as the break moves forward. Some glass containers are easier to separate than others. Dampen the included rough and fine sandpaper with water and smooth the freshly cut edges.
2. Condition and Mix Your Clay
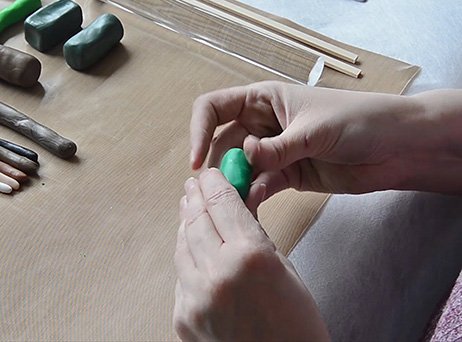 Condition each color of clay by rolling the block between your hands making a coil. You can fold the coil over and repeat. Avoid creating air bubbles. Repeat this process until the coil bends smoothly without breaking or crumbling. The clay should feel pliable and easy to manipulate by hand.
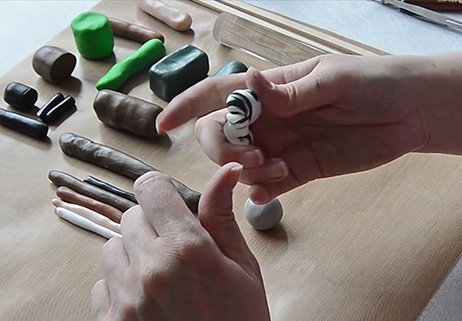 Colors mix much like paint. Use the primary and neutral clays to create desired colors. At first, the colors of the clay remain separate and create a striped or marbled design. As mixing continues, the colors begin to fully blend into a solid color.
 When rolling clay by hand, two wooden pieces of equal thickness may be placed on the sides of the clay. The wood keeps the roller level and avoids areas becoming uneven and too thin. When removing small pieces from the non-stick craft sheet, slide the cutting blade under the clay to easily loosen it without distortion. Clay may also be flattened by running it through a Craft Clay Machine.
3. Techniques for Doors, Walls, and Chimney
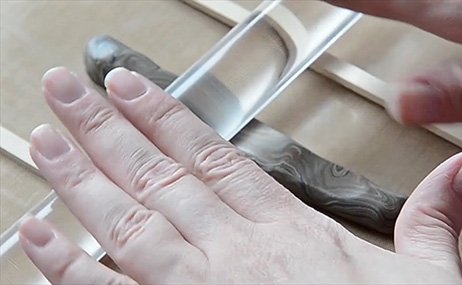
 For both the door and bark, we mixed cowboy brown, Kato brown, black, and white into a marbled state to mimic the color variation found in wood textures. Roll the coils into flat strips. For the door, cut individual planks, place them together, and texture with thin repeated scratches. Include nicks and imperfections for a realistic feel. Frame the door with pure Kato brown planks for color contrast.
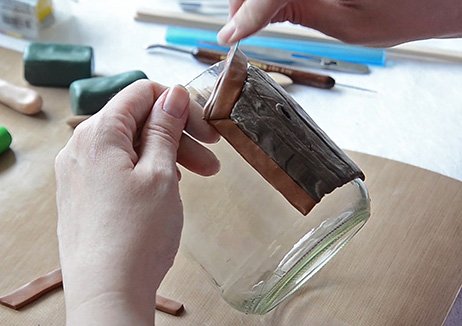
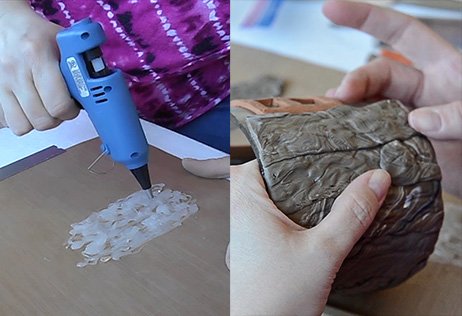 For the bark, create a texture on the heat resistant craft mat using the hot glue gun. Make thin, mostly vertical glue lines that overlap as the layers dry. This forms depth and irregular bumps to easily give a bark-like texture to the clay. Once cooled, press the clay face down onto the glue texture. Then press the textured strips onto the glass. Pieces may be overlapped to add extra depth where desired. Add windows and other details as desired. If the bark texture gets lost as the piece is handled, peel the glue from the craft mat and press it back into the clay as needed.
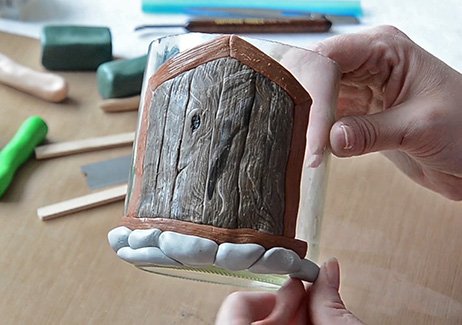 Create stones for steps (and extra for a chimney later) by mixing black, white, and a touch of brown if desired. Create irregular shapes and alternate the placement of the steps so that they overlap and the edges do not line up.
4. Pre-Bake and Paint
To strengthen the textures and forms for easy handling, we partially baked them for about 15 minutes. This hardens them enough to keep their shape, but they may be carved, cut, and attached using the liquid clay. This helps with handling and attaching delicate components such as the door handle and hinges, so we made them in time to include them in the prebake.
Preheat a kitchen, toaster, or Craft Oven to 265°F or the lowest temperature recommended for the selection of clay used in your project. Place the craft sheet on a baking sheet. Use aluminum baking foil to create a loose tent-like barrier over the piece to help the heat circulate around the piece evenly.
Tip: Use an oven thermometer to verify the temperature of the oven to avoid cracking or discoloration from overheating.
Bake at 265°F for 15 min. Allow to cool slowly in the oven.
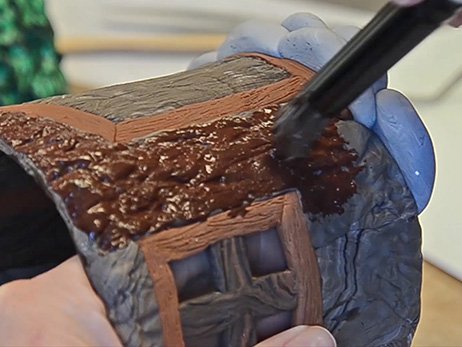 Slightly water down dark brown acrylic paint to brush across the bumps in the bark texture. Apply into the crevasses and wipe away the excess with a damp cloth. This adds an additional layer of depth and unity to the bark.
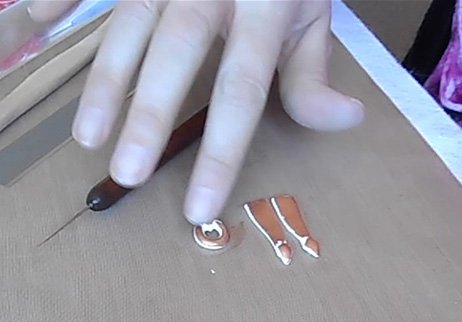 Acrylic paint or pigment powder may be added to the door handle and hinges. We used PanPastels to apply a metallic look. Use the liquid clay to attach the door handle and hinges. In cases where the pieces were stubborn and wanted to slide, we took an extremely tiny bit of unbaked clay and mixed it with the liquid clay to give it more grip.
5. Leaf Cane for Easy Shingles
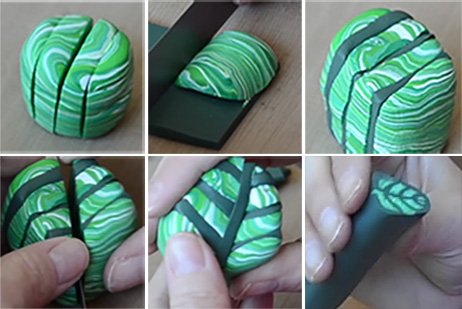 To prepare the leaf cane, we combined tropical green, Kato green, and white into a slightly marbled mix. Roll the green mixture into a short cylinder. Using the PolyBlade, make three parallel cuts dividing the cylinder into four sections. Roll out a strip of jungle green. Cut and insert a piece of jungle green between each of the four slices. Combine and press all the pieces back into a single cylinder. Make a diagonal cut across the parallel color stripes. Flip one half of the cylinder so that the dark green stripes create a V shape and place another piece of jungle green between the two halves. Next cut a long piece of jungle green and surround the entire cylinder.
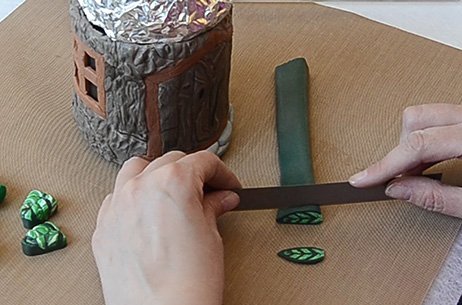 Shrink and elongate the cane by repeatedly pressing gently around the leaf shape. This takes some time, but the leaf shape runs through the entire cane. Allow the cane to sit/rest for a bit so that it isn’t quite as soft from the warmth of your hands. Then use the PolyBlade to thinly slice the leaves.
6. Create the Roof and Bake
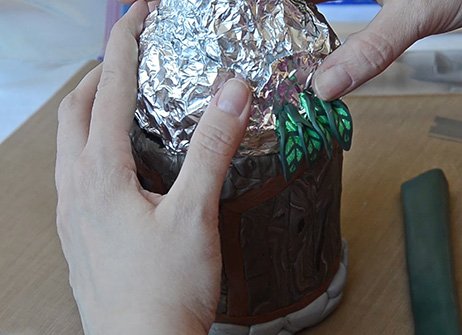 Form a tightly packed cone of aluminum foil into the desired shape of the roof. Pinch one end of the leaf to form a slight curl and press the leaf onto the foil starting at the bottom. Overlap the pinched area of the leaves to form a connection between them. Work around the cone and then move up to the next layer. Gently press the tip of the next row into the leaves below as you move up the roof.
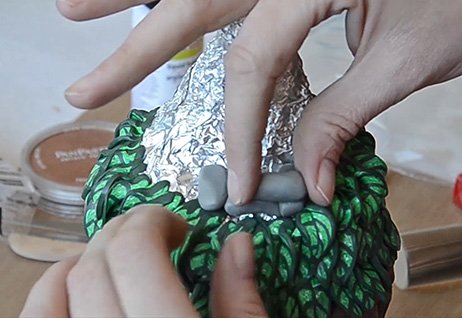 After the second or third row of leaves, insert the chimney with overlapping stones in a square stacked arrangement. Place leaves around the chimney to integrate it. Continue overlapping leaves all the way to the top of the cone.
Preheat the oven to 265°F. Place the roof on the baking sheet separately with the foil inside for support. Bake both parts of the house for 30 minutes for every ¼ inch of thickness of your piece. Ours required 2 hours. After the roof is cooled, the foil may be carefully removed. If for any reason the roof needs to be reheated, add the foil again for the interior support as the clay softens during heating.
More Project Sheets

Glow-in-the-Dark Mirror
- Difficulty Level: Beginner-Intermediate
- Completion Time: 2 Hours

Tools Silhouette Sign for Dad
- Difficulty Level: Beginner-Intermediate
- Completion Time: 1-2 Days

DIY Acrylic Pour Bracelet
- Difficulty Level: Beginner
- Completion Time: 2-3 Days

DIY Mason Jar Planter
- Difficulty Level: Advanced
- Completion Time: 2-3 Days

Marbled Ornament
- Difficulty Level: Beginner
- Completion Time: 1-2 hours

Clay Pumpkin Jar
- Difficulty Level: Beginner
- Completion Time: 1-2 hours

Pro Glow Tape Skull
- Difficulty Level: Beginner
- Completion Time: 1 hour

Personalized Pencil Pouch
- Difficulty Level: Beginner
- Completion Time: 1 hour (plus drying time)

Decorate Your Own Birdhouse
- Difficulty Level: Beginner
- Completion Time: 2-4 hours

Transparent Photo with High Gloss
- Difficulty Level: Beginner
- Completion Time: 1.5 hours

Sketching with Graphite Putty
- Difficulty Level: Beginner
- Completion Time: 8 hours

Scratch Art with Color Accents
- Difficulty Level: Beginner/Intermediate
- Completion Time: 1-3 hours

Polymer Clay Fairy House
- Difficulty Level: Intermediate
- Completion Time: ~8 hours

Experiment with Resin Casting
- Difficulty Level: Beginner/Intermediate
- Completion Time: 1-2 hours (pre-cure)

Color-Splash Vision Board
- Difficulty Level: Beginner
- Completion Time: 3-4 hours

Etched Glass Holiday Gift Jar
- Difficulty Level: Beginner/Intermediate
- Completion Time: 1 hour

Create a colorful reminder of the good things in life
- Difficulty Level: Beginner/Intermediate
- Completion Time: 1 hour

Face Painting with Custom Stencils
- Difficulty Level: Beginner/Intermediate
- Completion Time: 1 hour

Art Deco Pendant with Polymer Clay
- Difficulty Level: Beginner
- Completion Time: 1 hour

Transfer Designs with Lazertran
- Difficulty Level: Beginner
- Completion Time: 15-20 minutes

Multimedia Painting with PanPastels
- Difficulty Level: Beginner/Intermediate
- Completion Time: 1-2 hours

Special Effects with Brusho Colors
- Difficulty Level: Beginner/Intermediate
- Completion Time: 1-2 hours

Make Your Own Paper Quilling Frame
- Difficulty Level: Beginner/Intermediate
- Completion Time: 10 hours

Make Your Own Greeting Cards
- Difficulty Level: Beginner
- Completion Time: 10-30 Minutes

Make Your Own Autumn Leaves Stained-Glass
- Difficulty Level: Beginner/Intermediate
- Completion Time: 1-2 hours

Make Your Own Magnetic Alien Message Board
- Difficulty Level: Beginner
- Completion Time: 2 hours

Make Your Own Compact Disc Drink Coasters
- Difficulty Level: Beginner
- Completion Time: 2 hours

Make Your Own Crayon Candles
- Difficulty Level: Intermediate
- Completion Time: 4 hours

Make Your Own Kite
- Difficulty Level: Intermediate
- Completion Time: 3 hours

Make Your Own Masquerade Ball Masks
- Difficulty Level: Intermediate
- Completion Time: 2.5 hours

Make Your Own Multimedia Greeting Card
- Difficulty Level: Intermediate
- Completion Time: 2 hours

Make Your Own Bouquet of Photo Flowers
- Difficulty Level: Beginner
- Completion Time: 1 hours

Make Your Own Rock Zoo
- Difficulty Level: Beginner
- Completion Time: 2 hours

Make You Own Custom Sketchbook
- Difficulty Level: Intermediate
- Completion Time: 2 hours

Make Your Own Stained Glass Window
- Difficulty Level: Beginner
- Completion Time: 2 hours

Make Your Own Oil Painting T-Shirt
- Difficulty Level: Intermediate
- Completion Time: 24 hours

Make Your Own Paper Mache Bowl
- Difficulty Level: Intermediate
- Completion Time: 24 hours