


Project Sheet
DIY Mason Jar Planter
- Difficulty Level: Advanced
- Completion Time: 2-3 Days (with dry time)
Watch a video overview:
DIY Mason Jar projects continue to grow in popularity, especially when combining organization and decor. These tutorials span across Pinterest and social media platforms. MisterArt.com is excited to share our giftable twist to ring in the wedding bells!
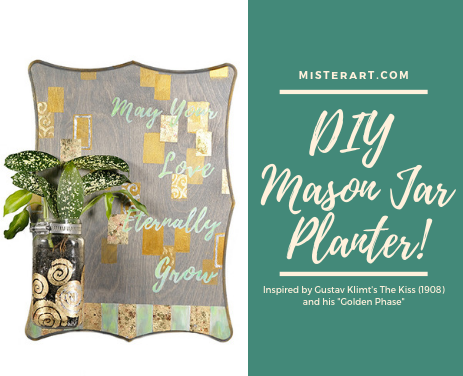
While we all love weddings, it can get pretty expensive, so we created an alternative wedding gift idea for the season. Inspired by Gustav Klimt's The Kiss (1908), we’ve designed a decorative DIY Mason Jar Planter - complete with gold leaf accents - to express your best wishes for the newlyweds. The best part is, you can customize this tutorial for other occasions by simply choosing an applicable quote and swapping the item inside the jar.
What You'll Need
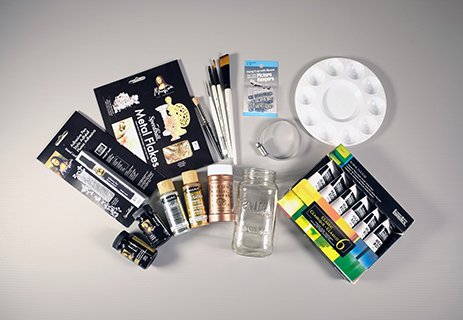
- Mona Lisa Metal Flakes (We Used Variegated)
- Mona Lisa Extra Thick Metal Leaf Adhesive (2 oz.)
- Mona Lisa Adhesive Pen Plus Silver Leaf (Optional)
- Mona Lisa Water-Based Medium & Sealer
- Dazzling Metallics by DecoArt (Used Venetian Gold & Silver Sage to Decorate the Wood)
- Picture Hanging Kit
- Clear Self-Adhesive Laminate by Con-Tact Brand
- Craft Detail Scissors by Armada
- Firm Bristle Brush
- Brushes
- Clear Tape
- Wood or Pre-Cut Plaque (Our Pre-Cut Plaque is about 11” x 15”)
- Hose Clamps (to Secure Mason Jars to Wood)
- Drill
- Drill Bits
- Screws
- Cotton Rag
- Gloves
- Wood Stain (We Used Weathered Gray)
- 8, 12, or 16 oz. Mason Jars
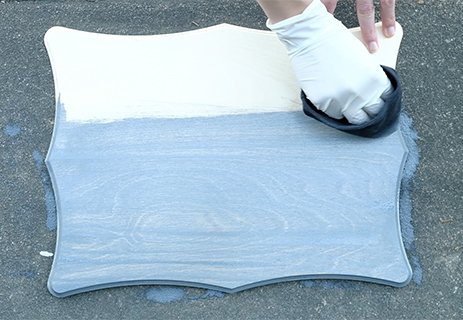
1. Apply Wood Stain
 We suggest reading the stain’s label instructions and manufacturer’s tips, but here are a few general ones to keep in mind:
You might consider a Pre-Stain Wood Conditioner to better absorb the color and If the wood is pre-treated, lightly sand first to open up the grain. Apply a thin, even layer of stain with a clean rag in the direction of the grain. Choose a cloth that won’t leave fuzz or fibers behind such as an old cotton T-shirt. Work the stain into the wood, avoid clumps and collection in the grooves of the wood. Allow drying time between each coat. Apply additional coats to the darkness of your preference or keep it light.
Drying time varies depending on the temperature, humidity, thickness of application, etc. A safe bet is to allow coats to dry overnight for best results.
2. Form Your Message
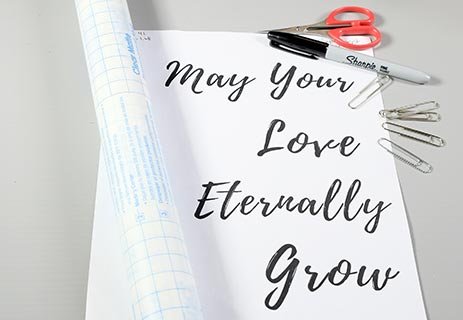 While the wood stain is drying, plan your message. Need an alternative to the fancy Cricket style or die-cut machines? Try using scissors, contact paper, and a software like Microsoft Word or Adobe Creative Suite. Our quote features Playlist Script at 104 point size. Avoid thin fonts for this handmade method as cutting and adhering to the board will prove to be a greater challenge. Print it out using regular printer paper.
3. Quote Transfer
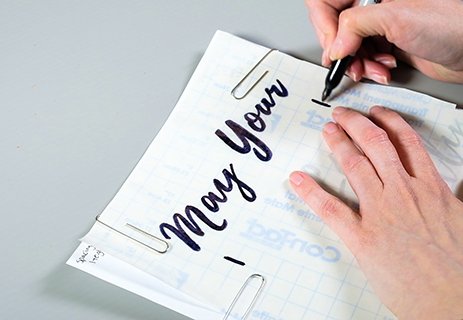 Place the self-adhesive laminate on top of the printed quote, with the transparent film facing up and the paper-backing facing the quote. Use paper clips to securely hold the printer paper to the laminate for tracing.
ARTISTIC TIP: Since the laminate comes rolled up, roll it in the opposite direction a few times to help it to lay flat for tracing.
Trace the letters onto the laminate using a permanent marker.
While tracing, place two reference lines on the laminate surface between each line of text. You can follow the grid featured on the backing paper. This provides a visual marker to be matched up when adhering the text to the board for easier alignment.
Also, cutting around the letters is easier when the quote is divided and cut into separate strips for each line of text.
4. Cutting Out Text
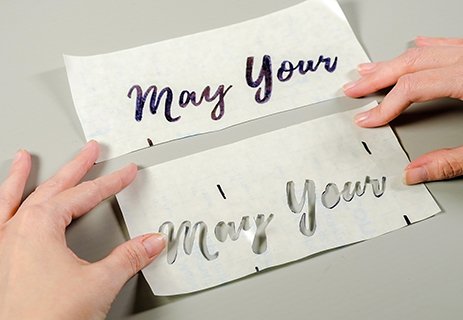 You may use an X-Acto knife to cut out the letters, but for those of you who have discovered that craft knives are not your friend, try this scissor method. To begin, create a straight cut towards the first letter. Don’t worry, you’ll reseal this with transparent tape before painting. Carefully follow the outline of the letters. Do not cut the letters themselves, instead, cut around the letters. This will create a self-adhesive stencil that you will place on the wood to assist in painting.
Place a piece of tape on the laminate surface to reseal any cutting paths from the edge of the paper to the letters. Be sure to hang onto the inside of letters like “o”, “a”, and “e.”
5. Add Designs to Background
 When the wood stain is completely dry, it’s time to add decorative designs with paint and gold leaf.
Use the outlined quote on laminate film - keeping the paper-backing on for now - and sample the placement.
ARTISTIC TIP: Create reference marks as needed for the text and jar placement so it remains legible.
Create additional stencils as desired using the Clear Self-Adhesive Laminate. We cut out a small series of rectangles to follow our Klimt inspiration. Peel off the paper-backing and press it securely to the wood.
Grab your paint, a flat brush and apply a thin layer of paint to the inside of the stencils. We used a combination of the Dazzling Metallics by DecoArt. These handmade stencils may be reused several times throughout the project.
6. A Touch of Gold Leaf
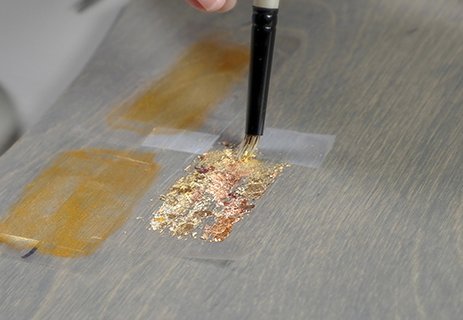
 For more visual texture, we used Mona Lisa Metal Leaf Flakes in variegated colors as it compliments The Kiss by Gustav Klimt. The touch of gold and silver make this design step simple, yet elegant for a wedding gift.
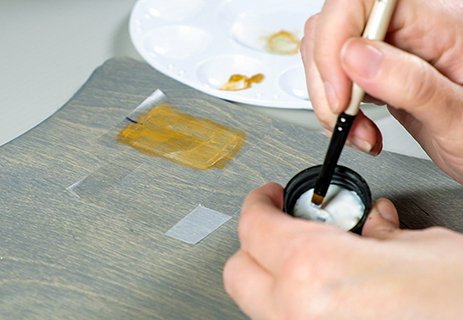
ARTISTIC TIP: Designate one brush to apply Mona Lisa Adhesive Size as the adhesive is difficult to clean completely from the brush.
Apply a thin layer of the adhesive and allow it to become tacky. The adhesive goes on white and appears clear when ready for the metal flakes.
Using clean hands or a clean brush cover the area with metal flakes. Gently press the flakes into the adhesive with the brush or use a sheet of paper over them and rub with your hands. Miss a spot? Add additional size if needed and/or place more gorgeous flakes on top. Brush away any additional unstuck pieces.
ARTISTIC TIP: Use a bowl to catch & save any leftover Metal Leaf Flakes.
7. Decorating The Mason Jar (Optional, but Totally Worth it!)
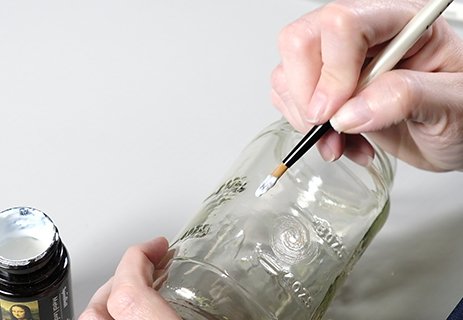 First, prepare the glass surface by applying a semi-thick layer of Adhesive Size with a paint brush. The adhesive is slow-drying and should stay tacky for 24 hours. We created swirls with the adhesive, but choose any design you prefer. Continue with the swirl pattern in various areas around the outside of the jar.
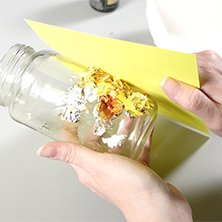
Adhering the Metal Leaf Flakes
Grab the bowl you previously used to capture the flakes and sprinkle them onto the adhesive pattern. Keeping the bowl under the jar, gently wrap a piece of printer paper on top of the Metal Leaf Flakes. Rub over the paper to ensure the flakes stick. Remove the paper and use a thick stencil brush to release extra flakes on top to reveal the newly patterned Metal Flakes. Continue this step until all the adhesive patterns are covered with Metal Leaf Flakes.

Add a coat of the Mona Lisa Water-Based Medium & Sealer over any places where metal flakes were used. This sealer is specifically formulated to protect the Metal Leaf from tarnishing.
8. Applying the Quote
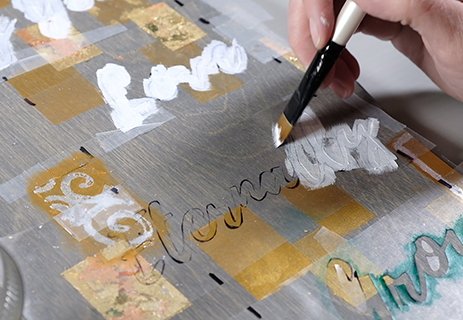 When the background is dry, you may apply the quote by carefully peeling off the paper-backing. Apply the laminate film line by line and match up the reference lines you drew between the text. Be sure to smooth out any air bubbles and form secure edges so that the paint doesn’t leak under the laminate.
Next, use paint to carefully fill in the letters for the quote and allow to dry completely. We started with white and added in shades of green to match the flakes and the plant.
9. Attaching the Hose Clamp & Mason Jar
 We chose to drill prior to adding any decor, feel free to do it whichever way you prefer. Here are some general tips to help you get started drilling:
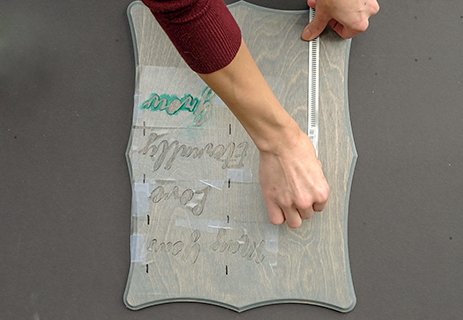
• Use a pencil to create reference marks for the top, bottom, and sides of the mason jar where you want it placed on the wood.
• Ensure you have the proper size drill bit to match up with the size of the screws you will be using.
• Titanium drill bits are more durable for high-performance drilling and will make this step easier.
• Take apart the hose clamp by unscrewing it and gently stretching out the metal to lay it flat on the wood.
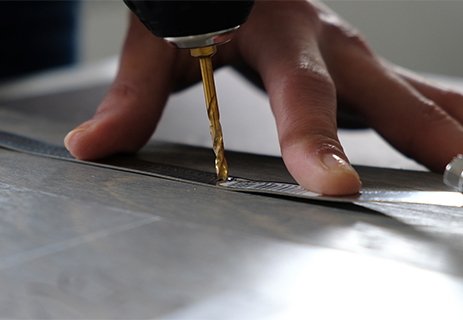
There are two ways you can use the drill bit to secure the hose clamp to the wood:
1) Use the drill bit to get a pilot hole started in the wood, where you’ll eventually screw in the hose clamp. Also, use the same drill bit to drill a hole in the hose clamp.
 2) The method we used requires more pressure and stability, but it works just as well. Using the mason jar reference marks, also use a pencil to mark the entry point for the hose clamp on the wood. Vertically place the hose clamp on the wood and match it to your entry point mark. While holding the hose clamp in place, apply pressure and use the drill bit to drill a hole.
 Once you’ve created the hole, make sure everything is lined up properly and screw the hose clamp into the wood. Take your mason jar and re-tighten the hose clamp to fit the top of the jar.
10. Add the Plant & Hang it Up
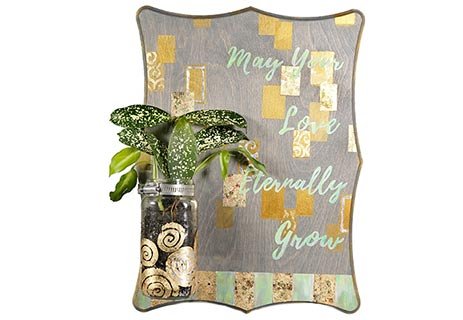 For this step, you will need a small amount of soil, rocks, and a plant or herb you want to display in the mason jar. Since the jar doesn’t have holes in the bottom like a regular flower pot, we suggest adding small rocks to the bottom of the jar to allow the water to drain away from the soil to avoid over-watering.
Nail 2 picture hangers on the backside of the wood from the picture hanging kit. Keep in mind the weight of the planter.
More Project Sheets

Glow-in-the-Dark Mirror
- Difficulty Level: Beginner-Intermediate
- Completion Time: 2 Hours

Tools Silhouette Sign for Dad
- Difficulty Level: Beginner-Intermediate
- Completion Time: 1-2 Days

DIY Acrylic Pour Bracelet
- Difficulty Level: Beginner
- Completion Time: 2-3 Days

DIY Mason Jar Planter
- Difficulty Level: Advanced
- Completion Time: 2-3 Days

Marbled Ornament
- Difficulty Level: Beginner
- Completion Time: 1-2 hours

Clay Pumpkin Jar
- Difficulty Level: Beginner
- Completion Time: 1-2 hours

Pro Glow Tape Skull
- Difficulty Level: Beginner
- Completion Time: 1 hour

Personalized Pencil Pouch
- Difficulty Level: Beginner
- Completion Time: 1 hour (plus drying time)

Decorate Your Own Birdhouse
- Difficulty Level: Beginner
- Completion Time: 2-4 hours

Transparent Photo with High Gloss
- Difficulty Level: Beginner
- Completion Time: 1.5 hours

Sketching with Graphite Putty
- Difficulty Level: Beginner
- Completion Time: 8 hours

Scratch Art with Color Accents
- Difficulty Level: Beginner/Intermediate
- Completion Time: 1-3 hours

Polymer Clay Fairy House
- Difficulty Level: Intermediate
- Completion Time: ~8 hours

Experiment with Resin Casting
- Difficulty Level: Beginner/Intermediate
- Completion Time: 1-2 hours (pre-cure)

Color-Splash Vision Board
- Difficulty Level: Beginner
- Completion Time: 3-4 hours

Etched Glass Holiday Gift Jar
- Difficulty Level: Beginner/Intermediate
- Completion Time: 1 hour

Create a colorful reminder of the good things in life
- Difficulty Level: Beginner/Intermediate
- Completion Time: 1 hour

Face Painting with Custom Stencils
- Difficulty Level: Beginner/Intermediate
- Completion Time: 1 hour

Art Deco Pendant with Polymer Clay
- Difficulty Level: Beginner
- Completion Time: 1 hour

Transfer Designs with Lazertran
- Difficulty Level: Beginner
- Completion Time: 15-20 minutes

Multimedia Painting with PanPastels
- Difficulty Level: Beginner/Intermediate
- Completion Time: 1-2 hours

Special Effects with Brusho Colors
- Difficulty Level: Beginner/Intermediate
- Completion Time: 1-2 hours

Make Your Own Paper Quilling Frame
- Difficulty Level: Beginner/Intermediate
- Completion Time: 10 hours

Make Your Own Greeting Cards
- Difficulty Level: Beginner
- Completion Time: 10-30 Minutes

Make Your Own Autumn Leaves Stained-Glass
- Difficulty Level: Beginner/Intermediate
- Completion Time: 1-2 hours

Make Your Own Magnetic Alien Message Board
- Difficulty Level: Beginner
- Completion Time: 2 hours

Make Your Own Compact Disc Drink Coasters
- Difficulty Level: Beginner
- Completion Time: 2 hours

Make Your Own Crayon Candles
- Difficulty Level: Intermediate
- Completion Time: 4 hours

Make Your Own Kite
- Difficulty Level: Intermediate
- Completion Time: 3 hours

Make Your Own Masquerade Ball Masks
- Difficulty Level: Intermediate
- Completion Time: 2.5 hours

Make Your Own Multimedia Greeting Card
- Difficulty Level: Intermediate
- Completion Time: 2 hours

Make Your Own Bouquet of Photo Flowers
- Difficulty Level: Beginner
- Completion Time: 1 hours

Make Your Own Rock Zoo
- Difficulty Level: Beginner
- Completion Time: 2 hours

Make You Own Custom Sketchbook
- Difficulty Level: Intermediate
- Completion Time: 2 hours

Make Your Own Stained Glass Window
- Difficulty Level: Beginner
- Completion Time: 2 hours

Make Your Own Oil Painting T-Shirt
- Difficulty Level: Intermediate
- Completion Time: 24 hours

Make Your Own Paper Mache Bowl
- Difficulty Level: Intermediate
- Completion Time: 24 hours