


Project Sheet
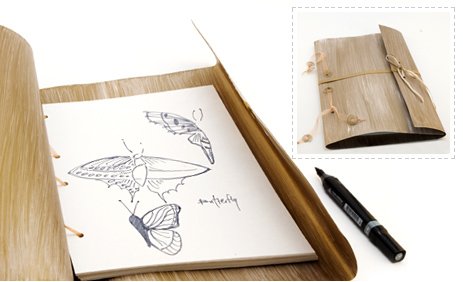
Make Your Own Custom Sketchbook
Why limit your creativity to the pages?
- Difficulty Level: Intermediate
- Completion Time: 2 hours
 Whether you're a professional artist or simply a determined amateur starting out, it's important to constantly work on improving your artistic eye and drawing skills. That's why it's a great idea to carry a sketchbook with you wherever you go. If you scribble down ideas and inspirations from your everyday life, sketchbooks can become great repositories of ideas from which to draw upon in the studio. MisterArt.com has great deals on all types of sketchbooks, but with a little work, these useful tools can also be artistic creations themselves!
What you'll need
Before you can start cutting, punching, and painting, there are a few supplies that you'll need to gather first. When assembled, these materials make for a sturdy, attractive sketchbook that you can take anywhere:
- Bristol Paper
- Decorative Clips
- Glue
- Gold Paint
- Hole Punch
- Parchment Paper
- Ribbon
- Scissors
- Sponge Brush
- T-Square
1. Starting out
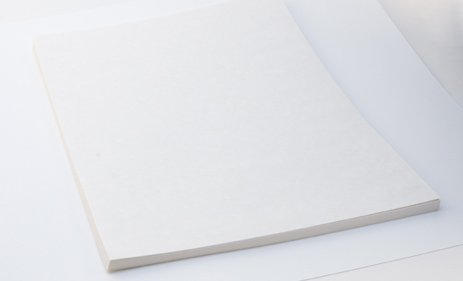 The first step in creating our sketchbook is to cut the Bristol paper down to size in order to serve as our cover. Ideally, the Bristol should wrap around the sheaf of parchment paper with a three-inch overlap. This overlap will form the flap we'll use to tie the sketchbook shut once it's complete.
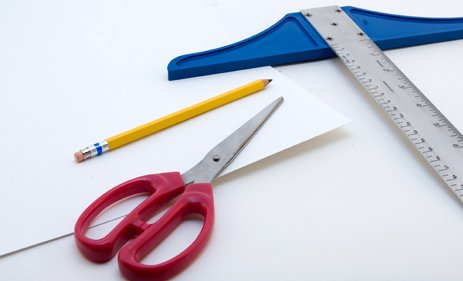 Using the T square, mark off a section of Bristol that is 14 inches by 22 inches using a pencil. Use the scissors to cut away the excess Bristol.
2. Adding color
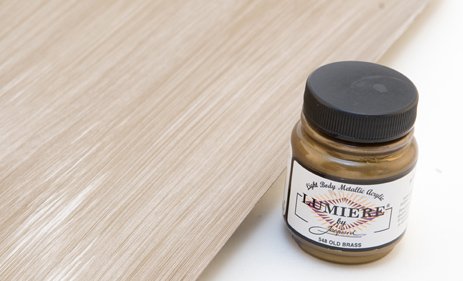 Next, it's time to add some color to our cover. Place the Bristol on to an easel or flat on a tabletop. Pour a small amount of gold paint on to a palette and soak it up with the tip of the sponge brush. Using long, smooth strokes, brush the paint on to the Bristol from side to side. Apply the paint as lightly or heavily as you'd prefer; different amounts of paint create different effects. A medium amount of paint results in an attractive wood grain look.
If the paint is difficult to brush on evenly, add a bit of water to thin it out. Paint both sides of the Bristol, allowing the first side to dry before tackling the second.
3. Not exactly origami
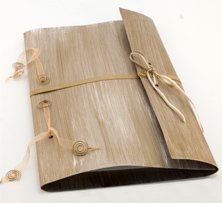
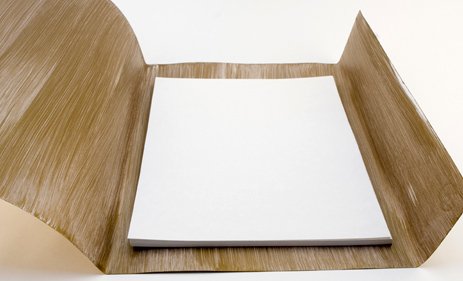 Once the paint has dried, place the sheaf of parchment paper on to one half of the Bristol. Fold the Bristol so that it wraps around the sheaf, leaving a three-inch overlap where we can attach a fastener later. Crease the folds as best you can to ensure that the cover keeps its shape.
4. Punch out
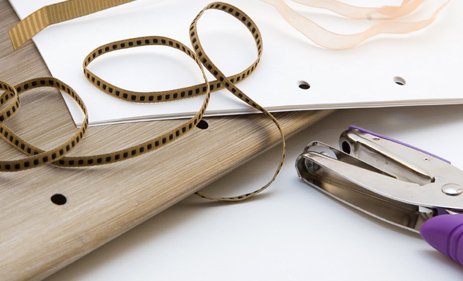 Using the T square, mark off spots for four holes about one inch in from the spine of the cover. The holes can be off center if you'd like, or make them an equal distance apart. Using the hole punch, punch through both sides of the cover, making four holes all the way through our folded Bristol.
Next, place a sheet of parchment paper over the front cover of the folded Bristol. Lining up the paper where you'd like it rest inside the cover, trace the holes in the cover with a pencil on to the parchment. Don't place the edge of the paper too close to the spine-- the sketchbook will be difficult to open if the sheaf of paper rests too snugly inside. Once you've traced the holes on to the paper, punch them out. We now have a template for the pages! The hole puncher isn't strong enough to punch through the whole sheaf at once, so line up a few sheets at a time flush with the template and punch all four holes. Repeat this process until all of the paper has been punched.
5. Shut the flap
Now that the binding holes are taken care of, it's time to punch some holes in our cover's flap to tie it down. Punch two holes about an inch in from the inner edge of the flap. These holes look great if they match up with the positioning of two binding holes on the cover's spine. Next, fold the flap over and trace where they overlap the cover while the book is closed. Now punch out two holes where you've traced.
6. Tie a ribbon 'round
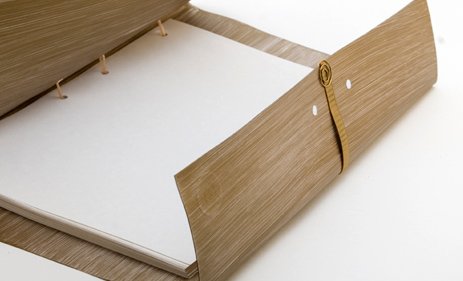 With all of our holes punched, it's time to bind our book. Place the parchment paper inside the cover so that all of the holes line up. Thread a strip of ribbon through one hole at the top of the spine and one hole at the bottom, then feed this ribbon though the hole next to it. Tie the ends together tightly to bind our new sketchbook!
For the flap, first thread a ribbon through both holes in the front cover. Then fold down the flap and thread the ribbon through both holes in it. By tying the ribbon's ends together, we can keep our book closed, away from the eyes of our artistic rivals!
7. Embellishment
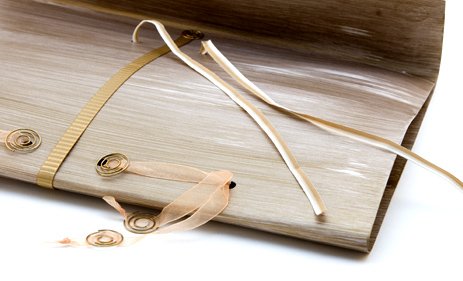 Attach decorative clips to the loose ends of our binding ribbons and one between the holes in the book's flaps. Using school glue or a hot glue gun, attach a thick ribbon around the outside of the cover. Now our sketchbook is looking classy!
 If that isn't enough adornment for your taste, don't forget to experiment! Use ink, paint, pens, markers, stickers, and more to personalize the cover of your new sketchbook. You can find great deals on all of that stuff at MisterArt.com.
8. Getting sketchy
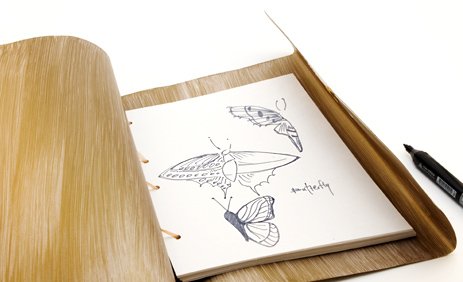 Now it's time to christen the creation! Make your first sketch something special-- it's the first thing people will see when they open your hand-made, custom sketchbook!
More Project Sheets

Glow-in-the-Dark Mirror
- Difficulty Level: Beginner-Intermediate
- Completion Time: 2 Hours

Tools Silhouette Sign for Dad
- Difficulty Level: Beginner-Intermediate
- Completion Time: 1-2 Days

DIY Acrylic Pour Bracelet
- Difficulty Level: Beginner
- Completion Time: 2-3 Days

DIY Mason Jar Planter
- Difficulty Level: Advanced
- Completion Time: 2-3 Days

Marbled Ornament
- Difficulty Level: Beginner
- Completion Time: 1-2 hours

Clay Pumpkin Jar
- Difficulty Level: Beginner
- Completion Time: 1-2 hours

Pro Glow Tape Skull
- Difficulty Level: Beginner
- Completion Time: 1 hour

Personalized Pencil Pouch
- Difficulty Level: Beginner
- Completion Time: 1 hour (plus drying time)

Decorate Your Own Birdhouse
- Difficulty Level: Beginner
- Completion Time: 2-4 hours

Transparent Photo with High Gloss
- Difficulty Level: Beginner
- Completion Time: 1.5 hours

Sketching with Graphite Putty
- Difficulty Level: Beginner
- Completion Time: 8 hours

Scratch Art with Color Accents
- Difficulty Level: Beginner/Intermediate
- Completion Time: 1-3 hours

Polymer Clay Fairy House
- Difficulty Level: Intermediate
- Completion Time: ~8 hours

Experiment with Resin Casting
- Difficulty Level: Beginner/Intermediate
- Completion Time: 1-2 hours (pre-cure)

Color-Splash Vision Board
- Difficulty Level: Beginner
- Completion Time: 3-4 hours

Etched Glass Holiday Gift Jar
- Difficulty Level: Beginner/Intermediate
- Completion Time: 1 hour

Create a colorful reminder of the good things in life
- Difficulty Level: Beginner/Intermediate
- Completion Time: 1 hour

Face Painting with Custom Stencils
- Difficulty Level: Beginner/Intermediate
- Completion Time: 1 hour

Art Deco Pendant with Polymer Clay
- Difficulty Level: Beginner
- Completion Time: 1 hour

Transfer Designs with Lazertran
- Difficulty Level: Beginner
- Completion Time: 15-20 minutes

Multimedia Painting with PanPastels
- Difficulty Level: Beginner/Intermediate
- Completion Time: 1-2 hours

Special Effects with Brusho Colors
- Difficulty Level: Beginner/Intermediate
- Completion Time: 1-2 hours

Make Your Own Paper Quilling Frame
- Difficulty Level: Beginner/Intermediate
- Completion Time: 10 hours

Make Your Own Greeting Cards
- Difficulty Level: Beginner
- Completion Time: 10-30 Minutes

Make Your Own Autumn Leaves Stained-Glass
- Difficulty Level: Beginner/Intermediate
- Completion Time: 1-2 hours

Make Your Own Magnetic Alien Message Board
- Difficulty Level: Beginner
- Completion Time: 2 hours

Make Your Own Compact Disc Drink Coasters
- Difficulty Level: Beginner
- Completion Time: 2 hours

Make Your Own Crayon Candles
- Difficulty Level: Intermediate
- Completion Time: 4 hours

Make Your Own Kite
- Difficulty Level: Intermediate
- Completion Time: 3 hours

Make Your Own Masquerade Ball Masks
- Difficulty Level: Intermediate
- Completion Time: 2.5 hours

Make Your Own Multimedia Greeting Card
- Difficulty Level: Intermediate
- Completion Time: 2 hours

Make Your Own Bouquet of Photo Flowers
- Difficulty Level: Beginner
- Completion Time: 1 hours

Make Your Own Rock Zoo
- Difficulty Level: Beginner
- Completion Time: 2 hours

Make You Own Custom Sketchbook
- Difficulty Level: Intermediate
- Completion Time: 2 hours

Make Your Own Stained Glass Window
- Difficulty Level: Beginner
- Completion Time: 2 hours

Make Your Own Oil Painting T-Shirt
- Difficulty Level: Intermediate
- Completion Time: 24 hours

Make Your Own Paper Mache Bowl
- Difficulty Level: Intermediate
- Completion Time: 24 hours